WooCommerce Selects Paystack as Preferred Payments Partner in Africa – WordPress Tavern

[ad_1] WooCommerce has named Paystack its preferred payments partner for WooCommerce in Africa. More than 20,000 merchants are using the free Paystack WooCommerce Payment Gateway plugin but searching for and downloading the plugin separately is no longer required. Store owners can now easily select Paystack as a payment method when inside the WooCommerce dashboard. Paystack has a recently updated tutorial for how to set up the gateway in WooCommerce. As an alternative to the recommended method, merchants can opt to install the free plugin instead. Paystack is the most widely used payment gateway in Africa, accounting for more than half of all online transactions in Nigeria. More than 60,000 stores use the gateway. In October 2020, it was acquired by Stripe for more than $200M. The gateway can be used by businesses in Nigeria and Ghana and last month it added support for South Africa, after a six-month long pilot program. “Paystack is leading the charge in bringing a world-class payments experience to African merchants,” WooCommerce Director of Business Development Mechiel Couvaras said. “Their product offering, user experience, and expansion plans within Africa were some of the most important factors in considering the partnership. Receiving funding from  Stripe and Visa was also a strong indicator of their potential.” Paystack, like all of WooCommerce’s other payment partners, has a financial arrangement with the e-commerce platform where it pays a percentage of transactions processed. Couvaras said the Paystack partnership is directly with Paystack and separate from WooCommerce’s Stripe partnership. “eCommerce is still very nascent in most African countries, however, Nigeria and South Africa are amongst our fastest growing countries globally,” Couvaras said. When Stripe acquired Paystack, the company noted that African online commerce is growing 21% year-over-year, 75% faster than the global average. WooCommerce is well-positioned to capture some of that growth with Paystack pre-installed as a preferred payment partner. The e-commerce platform is also keeping tabs on other emerging markets, as global market adoption has grown to 8.2% of the Alexa top 10 million websites. Over the past year WooCommerce launched partnerships with Indian payment companies Razorpay and PayU India, as well as Mercado Pago, a Latin American payments company focused on supporting local payment methods across Mexico, Brazil, Argentina, Colombia, Chile, Peru and Uruguay. Like this: Like Loading… [ad_2] Source link

Continue reading

WooCommerce Advanced Product Labels Plugin Review/Tutorial (2021)

[ad_1] Have a WooCommerce store and wish to stand out from other merchants selling online? Try adding product labels. Product labels are a great way to showcase important details about your product, display special offers, and highlight ongoing sales in your store. And if you brighten them up with eye-catching colors and interesting graphics, they’ll look pretty dang appealing to anyone who visits your store. Today, we’re going to explore the capabilities of a plugin that makes it simple to add and manage product labels. Its name? Advanced Product Labels. WooCommerce Advanced Product Labels is a powerful WordPress plugin by BeRocket offering a range of attractive templates, label content options, advanced styling, and more. It’s designed to help you improve conversions by making products dynamic, engaging, and noticeable. It’s hard to describe the label effect with just text, so you can check out the plugin in action here and here to see what I mean. These are live examples of what Advanced Product Labels helps you create. The plugin has almost 30,000 installs and has been on the market since 4 years. In our hands-on WooCommerce Advanced Product Labels review, I’ll give you a detailed look at how this plugin works and how you can use it to add labels to your products. WooCommerce Advanced Product Labels Review: The Feature List In a nutshell, BeRocket Advanced Product Labels is a product personalization, and enhancement tool specifically built for WooCommerce and WordPress. It helps you create product labels that stand out on your site with features like: Article Continues Below 50+ ready-to-use templates, including customizable CSS templates, discount timer templates, and image templates Various content types and product conditions Label style options like font color and custom label borders Opacity & Gradient modification and shadow effect The tool also lets you choose the type of label you want to add to your products. For example, you can select the “In title” label to place the label to the right or left side of the product title. As BeRocket Advanced Product Label is a WooCommerce-specific tool, it plays nicely with the core WooCommerce installation. All you have to do is install it on your WordPress WooCommerce site, permit it to access your WooCommerce functionality via the WordPress API, and you’re good to go. Hands-On with BeRocket Advanced Product Labels Now, let’s dive in, and I’ll show you how the different features of WooCommerce Advanced Product Labels work. 1. Creating a New Label To get started, you open up your WordPress dashboard and click BeRocket → Advanced Labels. Your next step is to add a label. To do so, click the Add Label button beside the Advanced Labels heading at the top of your screen. BeRocket will now redirect you to an area where you’ll find tools to create a new custom label from scratch. First, you’ll enter a title for your label. You could write “Sale” or “Bestseller” depending on how you wish to promote your items. Then, you can choose from the 17 conditions available for your product label. At this point, you can decide if you want to mix conditions using “AND” or “OR” operators. When creating a Sale label for my product, I selected On Sale as the first condition and Page ID as the second condition. Then I used the AND operator to form a relation between the two. Next, go to Advanced Label Settings and pick a template you want to use for your label. As you do that, BeRocket will give you options to hide the label on mobile, tablet, and/or desktop. Check the box for the device you don’t want the label to appear on. You also get to select from 8 content types for the label: Article Continues Below Depending on the option you choose, the plugin will modify the text, background image, and image title of the label. Once done, click Save to create your new label. 2. Modifying a Label’s Style Not content with the existing style of your label? No problem – you can tweak it through the Style tab in Advanced Labels Settings. Let me show you how it’s done. First, I’ll create a new label, this time to showcase stock status. Then, I’ll click the Style tab and select a new background color. There’s a lot of options to play with. You can modify the font size, width, height, border radius, border width, and more for your label. Two options that stood out to me are Opacity and Shadow effects. Used correctly, these two effects can draw attention to your best deals. 3. Changing a Label’s Position Another neat option in the Advanced Product Labels tab is Position. This setting allows you to decide between keeping the label in its current position, putting it on the image, or placing it in the product title. Based on the option type of position you choose, BeRocket will let you adjust the label for the positions left, right, and center. You can also adjust the padding and margin of the label and rotate it as a part of an A/B test to see if a uniquely positioned label improves your conversions. 4. Using Tooltip BeRocket Advanced Product Labels also lets you create a tooltip. Also known as a hint or info tip, a tooltip is a graphical UI element that displays a text box containing information about an element when a user hovers over it. You can create a tooltip for any label to inform visitors about its function or convey what a particular abbreviation stands for. BeRocket allows you to enter the content you want to display and upload a custom tooltip image.  Article Continues Below The plugin also lets you decide whether you want the tooltip to appear or close after a delay, whether it should have a dark, light, or translucent style, and more. Further, you can adjust the tooltip for positions top, bottom, left, and right. Place it wherever you think your visitors are most likely to

Continue reading

B2BKing Review 2021 – A WooCommerce Wholesale and B2B Extension

[ad_1] 
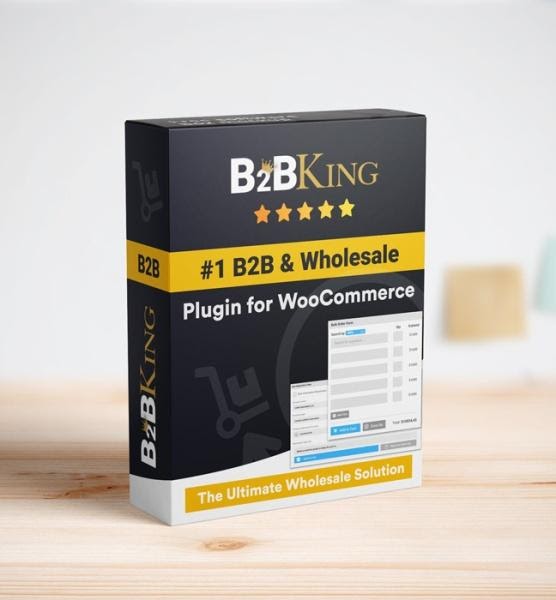
WooCommerce is highly flexible, so flexible that you can even mold them to Wholesale business requirements. Custom coding or a myriad of plugins might let you do that.  However, there are very few reliable single solutions for business owners to rely upon. For ventures thinking to digitize their B2B and B2C sales process, B2BKing is a great solution. It is known for its comprehensive feature list and reliability.  In this B2BKing review, we will evaluate the abilities of the B2BKing Plugin and assess it as a whole for you. B2BKing Plugin – An Overview This plugin is an extension that works for WooCommerce stores. It can enable all types of online ventures with B2B and B2C capabilities from entrepreneurs to middle-sized businesses and enterprises.  Businesses can add (and control access rights of) B2B users, B2C users, and logged out users. There are abilities like conversations, offers, dynamic rules, groups, customers, etc., that allow B2B sellers to handle requests, serve resellers/customers, and run their business efficiently. The developers of the plugin have integrated 137+ (!) features and components into the B2BKing. For instance it is WPML-supported and, therefore, will work well for your multilingual store too. With more than 14,000+ installs and 5+ ratings at present, many users deem it to be very useful for their store.  But is it worth the hype or attention? Should B2B and B2C eCommerce businesses consider deploying the B2BKing Plugin for their WooCommerce stores? Let us take a look! Assessing Features of B2BKing Plugin One of the fastest-growing plugins in the Envato marketplace, B2BKing is a feature-rich wholesale solution. But are its features all beneficial for your business? In this section, we will discuss its features and their value for your B2B plus B2C e-commerce business. Article Continues Below Create Groups Highlight: Control the facilities/visibility for various B2B and non-B2B users in different ways through group creation.  In B2BKing, your store users are categorized in 3 ways through groups. You can enter into the business groups section and create various business groups.  Users can be assigned to each of these groups and given shipping, payment, and dynamic (through rule-creation) rights. Besides this, B2C users are the ones who are not added to any of the business groups, and logged-out users (guest users) are the ones who are using your store without signing in. Through B2BKing, you can control shipping and payment methods for these two types of users too. Initiate Conversations Highlight: Let your resellers (or your own business) communicate needs faster through messaging. By posting messages through Conversations features in the B2BKing plugin, your administrator(s) and B2B users can broadcast their requirements. Others can see the conversation and respond to them to improve their B2B relationships.  Negotiation, discussion, and fulfillment of urgent requests become easy this way. Offers for specific users Highlight: Special deals or offers (different pricing for a product or a product bundle) for a few business users/groups. Article Continues Below There are times when B2B ventures want to specify different prices for specific users/groups or sell product bundles to a few users/groups. This can be done through Offers if you are using the B2BKing plugin.  Administrators can create offers. As per the set visibility, business users can see them in their dashboards. Purchase Lists for demand-specification  Highlight: Create or let users create B2B shopping lists to enable one-click re-ordering/purchase. Purchase lists can be created as per demand/sales using the B2BKing plugin. For example, if your resellers repeatedly buy a few products (or a bundle), it is better to add them to the purchase lists. Even the number of lists per product can also be specified. Here is one demo purchase list: It is also possible to enable or disable your purchase lists for different B2B buyers. Items, products, and bundles can be directly added to the cart from purchase lists in one click. Users can also create purchase lists by adding their cart (current condition at that instance) as a purchase list. Bulk Ordering Highlight: Allow fast custom bulk orders in your B2B e-commerce store. B2B businesses have multiple resellers, and for the same reason, a bulk ordering facility is super-crucial for such an e-commerce store. With the B2BKing plugin, you can easily enable this functionality in your online B2B shop.  Article Continues Below Your customers will be able to fill the bulk order form, specifying product names and quantity. This will help in faster order fulfillment. Adding Visibility Restrictions for Guests Highlight: Show/hide your products, their pricing, or the whole shop for logged-out users. Using the B2BKing WooCommerce Plugin, one can easily restrict the visibility of their shop for guests. You may just hide the pricing of your products, enable login, force login, or add a ‘get a quote’ form instead of pricing. This feature can improve the prospect subscription rate without affecting your store’ssearch-engine visibility/ranking adversely. Set Dynamic Rules Highlight: Create discount, pricing, visibility, users, and tax-related rules for your store. Dynamic Rules is amongst the most powerful feature of this WooCommerce plugin.  Discounting (fixed price or percentage), free shipping, order amount limit, tax rules, hidden price, minimum order quantity, order quantity limit, and tax exemption related conditions can be created through dynamic rules. Later, you may use these custom rules for the groups, conversations, offers, and other such capabilities of B2BKing. Handling Taxes and Tax Exemption B2B and B2C e-commerce stores can display pricing of products without or with taxes (GST, VAT) to their direct/reseller buyers. Other than the above, B2BKing also let B2B and B2C businesses: Create subaccounts to allow multiple people from your organization to make purchases or purchase requests; Enable custom fields in the B2B registration forms to get extra information as per your venture’s need; Request quotes and communicate through messages to finalize deals or for negotiation; Use the customer panel to view, group, and manage; Email notifications and offline gateway enablement; Controlling the payment and shipping methods for different users; Enable manual approval for each registration or B2B registrations; Separate login

Continue reading

Product Redirection for WooCommerce Review: Redirect Visitors Easily

[ad_1] Managing and scaling a WooCommerce shop is not easy. You need to take care of so many things at once, such as inventory, prices, design, constant updating, and whatnot. In between all of this, it’s possible to miss out on smaller tasks like stock running out or hurting your SEO due to deleting a product. To make sure this does not happen to you, Poly Plugins created a plugin to make WooCommerce redirection easier. In this article, I’ll review the plugin in-depth and will check out its features. Review: Product Redirection for WooCommerce Product Redirection for WooCommerce provides a solution for a specific problem that most big products in the WooCommerce space do not provide. Even if there are products that provide a similar solution, they are often bloated with other unnecessary features and end up slowing down the website. And I am sure we all know how important speed is when it comes to growing WooCommerce stores. So, What Does the Product Redirection Plugin for Woocommerce Do? The purpose of this plugin is to help WooCommerce store owners who are not familiar with SEO by allowing them to easily add redirects to deleted product pages. The plugin allows you to prevent deleting WooCommerce products and assigns required redirection instructions and notices for deleted products. This way, you can redirect the traffic you are getting on a specific page to a different one easily. Why is Redirection Necessary? When a user sees a 404 error, most of the time, they just go back and visit a different link, and this is not at all good for the business. Instead, you can lead the user to a different page and tell them, “The product is no longer available. Consider checking our other products.” Once the product is deleted, it does not tell Google to stop ranking it in search results. If someone looking for “AC DC Tshirt” lands on your product page and sees a 404 notice, they will just go back. This will give a negative signal to Google, and it will affect your rankings. On top of that, the increased bounce rate will become another problem altogether. To prevent this from happening, you need to provide proper (301 and 302) redirects. Features of Product Redirection for WooCommerce While exploring and using the plugin, I came across some useful features which I found worth sharing. Here are some of the notable features:  You can show a popup on the deletion of a product in the store backend suggesting to add a redirect or a notice. This would help you keep up with things even if you forgot to add redirects. For every product, you can easily add a redirect, display a notice or add a landing page for products. You can show related products under the notice. If any product goes out of stock, you can show an out-of-stock notice and can showcase related products below the notice. Since the product also handles the SEO aspects of redirection, you don’t have to worry; even if you are getting 50,000 hits per month on a product page, they will be redirected to the page you want. Hands-on with Product Redirection for WooCommerce In this section, I will install and explore the plugin’s features on a local WordPress installation.  The plugin has two versions: Free and Pro. The free version is available on the WordPress repository, and with the free version, you get the following features: Article Continues Below Warning notice to not delete products. Custom redirect options: parent category, custom URL. In addition to these features, you get these features in the pro version: Notices on product pages if the product is out of stock. Auto out of stock product management. Custom redirect to landing pages. Recommended products below notices. For this tutorial, we will check out the pro version of the product. Installation and Activation The product installation is simple and straightforward like any other plugin. You can download the plugin once you’ve purchased it. Go to Plugins > Add New. Upload the plugin and click on the Install button. If you do not have Advanced Custom Fields installed, you need to install it as well. However, you might not need to do that in the future, as the devs have plans to remove ACF dependency in the upcoming updates. And of course, this goes without saying; you’ll need a WooCommerce store set up to use this plugin. Backend and User Interface All settings and options are available in a single space in the WooCommerce tab. To access these settings, go to your WooCommerce website’s dashboard. Now click on WooCommerce > Redirection. We’ll be going into a bit of detail here, so sit tight! Here you will see four tabs: General, Out of Stock, License, and Support. General Tab Popup: This triggers a warning popup when you click trash or delete any product. The popup will look like this: Disable Trash/Deletion: When enabled, admins or any other users won’t be able to delete any product. Out of Stock Tab In this tab, you can define what happens when a product goes out of stock. Out of Stock: This check box enables all the options below. Out of Stock Notice: This option lets you set a custom notice when the product goes out of stock. Out of Stock Recommendations: Enabling this option will start showing related products from the parent category. Recommendations Product Count: This option allows you to select the number of products to recommend. Recommendation location: You can select the location for the recommendations. You can select from 9 different locations. License Tab In this tab, you can insert the license for your product. Probably, this is the first tab you’ll visit after installing the plugin. Article Continues Below Support Tab Although it is available as a tab, this option leads you to a new page where you can get support if you face any problems. How to Set Redirects for WooCommerce Products While most options are

Continue reading
1 2